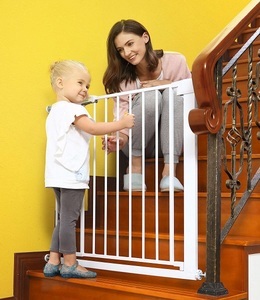
How To Install Baby Gate

Installing a baby gate into your home is a fantastic way to make sure that your toddler is kept safe from the dangers of stairways, helps to seal off entire rooms from curious crawling children, and can even be used to prevent them from wandering outside of their bedroom during the night.
But, whilst baby gates are undoubtedly a must-have piece of babyproofing equipment for any household with young children, their installation can be quite confusing to work out.
Even though most store-bought models will come with instructions, they often difficult to decipher and frustration can quickly set in.

Installing a baby gate correctly is paramount to the safety and security it offers, which is why getting it right the first time around is crucial.
Correct installation will also ensure that the walls and door frames it’s attached to are kept in good condition too, meaning that when the time comes to remove it you won’t have to worry about repainting anything.
If you’ve recently purchased a baby gate and you’re not sure about how to install it, or if you’re at the point of needing to get one and are concerned about how to fit it, don’t worry, we’ve got you covered.
Below, we’ve got some great advice on how to install a baby gate, along with some handy tips on how to make sure it’s as secure as possible whilst keeping your paintwork in excellent condition.
When to install baby gates
Babies grow into toddlers at a lightning speed, and before you know it you’ve got a fast-moving crawler that has no idea of the dangers they could get themselves into. That’s why it’s best to install baby gates as soon as possible, ideally when you’re child is around 3-6 months old.
This gives you the opportunity to get ahead of the game and have your security system in place long before it’s needed.
If you’re wondering where in the house you need to install a baby gate, take a look at our list of recommended areas below:
- The top and bottom of all staircases
- Kitchen entrances
- Patio and balcony doors
- Around a fireplace
- Your child’s bedroom doorway
- Across your front door
The 5 steps of installation
Installing a baby gate doesn’t need to be a difficult job. Below, we’ve broken the process down into manageable steps that will show you just how easy it can be when properly explained.
- Take the time to read any instructions that your baby gate comes with fully before beginning installation. Don’t just start on step one of your instruction manual and work as you go along, as this can lead you into trouble further down the line.
- If you’re installing your baby gate against a banister or railing, make sure you’ve got the proper installation kit to establish a secure connection. We’ll go into more detail on this further down the page.
- Make sure you’ve got the right tools for the job. If you’ve chosen a baby gate that requires a drill to install it, be certain that it’s fully charged and that you’ve got all the correct drill bits before you start.
- Once you’ve installed your baby gate, check it’s firmness and make sure it’s as secure as possible. You should also make sure that the gate can open all the way with ease and isn’t going to cause a trip hazard to any adults that go through it.
- Finally, check all of the locks and catches to make sure that the doorway of the gate automatically clicks back into place and cannot be easily opened by a child.
Now, let’s look at the different types of baby gates available, along with how to install a baby gate in trickier spots.
Types of baby gate
Baby gates come in several shapes and sizes, and the way they are installed will depend on the style you’ve gone for. The two most common types of baby gates are hardware-mounted and pressure-mounted, and each one requires a different form of installation.
Hardware-mounted baby gates need to be drilled into place, usually around a door frame or banister, to establish a stable connection. These are by far the most secure baby gates you can choose, as once they’ve been installed they are virtually impossible to remove without the use of tools.
Pressure-mounted baby gates use adjustable dials to create pressure between the baby gate and the door frame or wall it’s being installed against. It’s this pressure that keeps them firmly in place, and they are a lot easier to install that hardware-mounted baby gates since they don’t require any tools.
They also give you a lot more flexibility over space and allow you to find the perfect fit without needing to get your measurements 100 %correct.

Round posts and banisters
Many houses feature beautiful staircases with ornate banisters. But, as architecturally stunning as these are, they can make installing a baby gate quite difficult. In this case, your best bet would be to buy an installation kit.
These kits often include special adapters that can be placed against a round post and firmly clipped in place, allowing you to install that part of the gate against your banister without having to drill through it or worry about an unstable connection.
How to install a baby gate against dry wall or plaster
You need to be supe careful when you drill into dry wall or plaster, as one wrong move could create a huge hole that will cost you time and money to repair.
If you’re installing a baby gate against dry wall, the first thing you need to do is locate the wooden framework that is supporting the plasterboard.
There are special tools you can use for this, and a stud detector is also recommended so that you don’t end up accidentally drilling into any electrical wires or metal pipes.
Once you’ve found the wooden framework and you’re certain that there’s nothing obstructing it, you can begin drilling and installing your baby gate in the same way as you would to a wooden frame.
Keeping your walls and door frames protected
If you’ve gone for pressure-mounted baby gates, it’s important to create a protective barrier between the adjustable dials and the wall or door frame it’s being installed into.
If you don’t do this, then you can cause some serious damage to your existing paintwork, and you’ll have the unenviable task of repainting everything once the gates can be removed.
Luckily, you can purchase special wall protectors that you can simply slide inbewteen your baby gate and the wall as you install it. These will act as a buffer and prevent any paintwork damage from occurring.

